Building the TV display
- I’m not a professional woodworker and only have basic tools, so there may be better ways to build the joints etc..
- Whilst a fair amount of thought went into the overall design I never drew anything out and was more a case of measuring it / figuring it out as I went. Hence I’ve mostly taken photos of the finished product rather than at each stage.
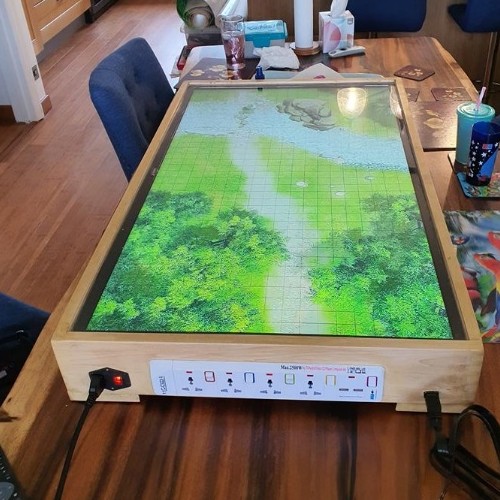
Having seen several of these on the internet I decided to take the plunge and design and build one myself. The unit wasn’t going to be in a single place so I wanted it to be practical and portable as well as serving its purpose. To that end I incorporated a power bar into the design so that only a single plug was needed for the unit whilst still being able to supply power to my laptop. The design also has a hdmi socket linked to the tv and fans to improve the ventilation.
Software wise I have been playing with Arkenforge Their masters toolkit is specifically designed for a tabletop TV and will autosize maps based on your TV dimensions. You can draw or import maps, handles video maps and has a sound effects module too. Its $30 so well worth the money. If your interested in creating outdoor dynamic maps then Flowscape is well worth looking at. Its available from $15 and is pretty powerful.
Woodworking tools needed
- Router with 5mm straight jig – This is needed to cut the groove for the Perspex, unfortunately there is no way around this
- Bandsaw (optional) – I used my bandsaw to do all the cutting although if you don’t have one then you could do it by hand.
- Holesaw bit – To cut the holes for the fans
- Jigsaw – to cut the holes for the switch and power bar
- Drill – for drilling holes 😊
Supplies
- Flatscreen TV - I used a Philips 5500 43inch TV that I picked up cheap on ebay. (see here) .Which TV you use is up to you but the most important things to consider in choosing the TV to use are the overall depth of the TV as this will determine the height of the unit and the weight of the TV – after all it needs to be portable.
- Wood planks – I used 110 x 18mm Maple as the wood, mostly because I wanted a hard wood that was fairly rigid, and maple was the best priced for me. The width of the wood needs to be bigger than the depth of your TV to cater for the perspex and some level of ventilation
- Strong wood Glue – For this I used Gorilla Glue, it seems to be pretty strong but any strong woodglue will do.
- Power Bar – This again is a matter of choice, although the size comes into it. I bought mine from Amazon and chose one with universal sockets and a couple of usb sockets for convenience. (see here)
- C14 socket and Switch - This is used for the main power to the unit. I have wired both the socket and TV into it so it only needs one cable to plug in. The one I used has a switch and a separate fuse. By using a C14 Socket you can easily source a power cable (they are the same ones used for most computer monitors). I sourced mine from Amazon (see here)
- C14 power cable – easily sourced from any electrical retailer.
- 60mm computer Fans x2 – These are easily sourced from any computer supplier. I’d recommend getting USB ones. Although the ones I bought had very short leads so I had to extend them using a connector block and a spare USB power cable. (see here)
- Fan covers – These are to cover the fan holes, it’s a preference thing
- Handle – To carry the unit – I have gone for a strap handle sourced from ebay. It just needs to be strong enough to carry the unit.
- HDMI extension cable – this is so that you can connect your laptop easily
- 4mm Perspex cut to size (see below)
- Clear sealant / glue – This is to glue the Perspex in place I used the stixall extreme power clear stuff
Building the unit.
- Measure the TV – this is going to define the size of the box and Perspex that is needed. You will want the TV to be a snug fit in the box so its important to get this right. Once you have the dimensions of the TV you need to add the thickness of your wood twice to get the lengths that need to be cut. For the TV I used the TV measurement was 970mm x 563mm and my wood was 18mm thick. Therefore I needed 2 lengths at 599mm (563+18+18) and 2 lengths at 1006mm (970+18+18)
- Cut the wood lengths, 2 of each size.
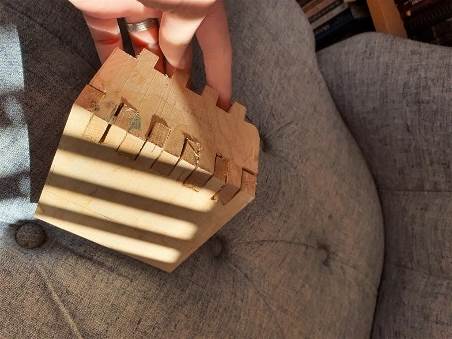
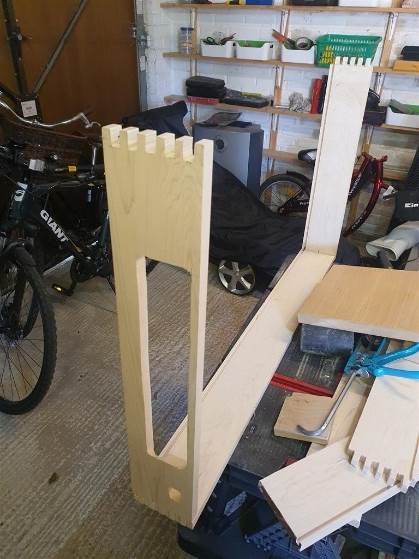
- Box joints for the corners – I decided to do box joints for the corners as they are relatively straight forward and reasonably strong. Each of my fingers was 1cm wide and then 18mm depth (to cater for the width of the wood).
- Cut the hole for the power bar. Take one of the short planks that you have cut and measure the hole you need for the powerbar. I would centre this hole so the power supply can sit on one side while the HDMI cable sits on the other. On the inside you will need to chisel away a chamfered slot to allow for the power cable coming out of the unit. You should check the power bar fits before putting the unit together.
- Cut the hole for the C14 power module
- Cut the hole for the female end of the HDMI extension cable.
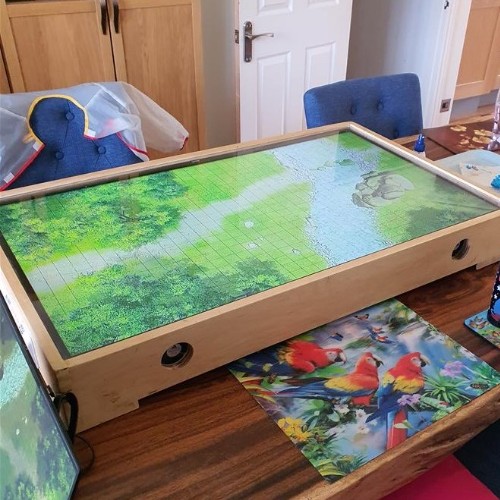
- Cut the holes for the fans on one of the long lengths of wood you have cut. I used a 55mm diameter holesaw to do this.
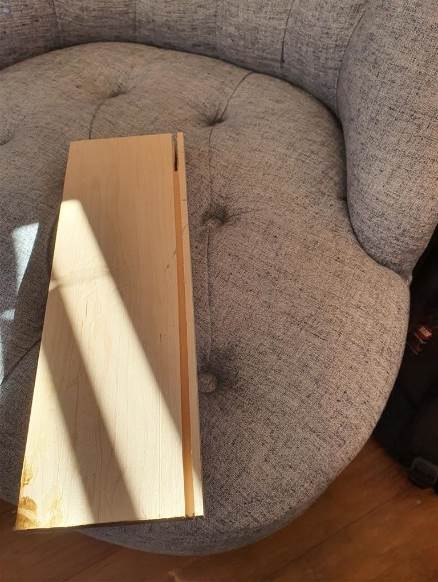
- Cutting the groove for the Perspex. This is where the router comes in. you need to cut a groove in each of the pieces of wood, on the inside edge so that when it is put together the Perspex sits in it. I set my groove 10mm from the edge of the wood to give it some strength as the tv will rest against it. Depth wise I went 10mm (just over half way into the wood). When ordering your Perspex you therefore need the TV size + about 16mm (8mm for each side for the slot) so in my case it was 579mm x 986mm.

- The next stage is to start to put together the box. Initially put the box together without glue to make sure the routered slots line up and the box is the correct size for your TV. Then glue the 2 ends to one of the base pieces ensuring they are at a 90 degree angle. The joints should be a reasonably tight fit. Use plenty of glue and don’t worry too much about any small gaps or overhangs, they can be catered for later with wood filler and sanding.
- Glue in your Perspex sheet using the clear sealant.
- Glue the top plank into place
- You should now have the completed box with the Perspex in place. Now is the time to fill and sand the edges before you put the TV in it.
- Slot in your power bar and Place the box flat with the Perspex sheet on the bottom. At this stage its worth thoroughly cleaning the inside perspex. Then lower your TV face down into the box. The top of the TV should on the edge with the ventilation holes in it.

- Fix the TV in place. I used wooden batons on 3 edges inside the box. The screws were placed at an angle so they push the tv onto the Perspex sheet.
- Screw the fans into place and rewire them if necessary. I used a connector block to wire both dans off the same usb plug.
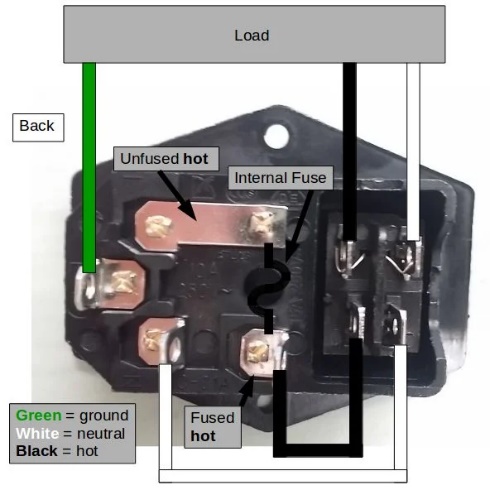
- Wire in the electrics. I wired both the TV wire and the powerbar into the socket. There is a useful online help on how to wire up the plug here.
- Slot in the HDMI cable to the hole and plug it into the TV.
- Add feet to the unit. I used triangles cut from the same wood, one on each corner with a protector then stuck on the bottom.
- Add the Handle
- Switch on and enjoy.